Silhouette Settings 10mil Laminate

Create Your Own Durable Planner Cover With A 10 Mil Laminate Of Course You Can Design Your Own Cover Or You Can Follow This Tutoria Sparkle Crafts Vinyl Crafts Paper Crafts
Cutting Laminated Shapes And Print And Cuts With Silhouette Plus Perfect Cut Settings Silhouette School

How To Make Planner Dividers With Your Silhouette How To Make Planner Planner Dividers Diy Planner

10 Mil Letter Laminating Pouches 9 X 11 1 2 Hot Qty 100 To View Further For This Item Visit The Image Link This Is Lettering Document Cameras Diy Coupons

High Performance Office Laminator For Professional Applications Laminates Pouches Up To 12 1 2 Quot Wide And 10 Mil Thick No Laminators Fellowes Office Items

Pin On Silhouette Cameo

I was playing with settings but i haven t been able to get more than half way through.
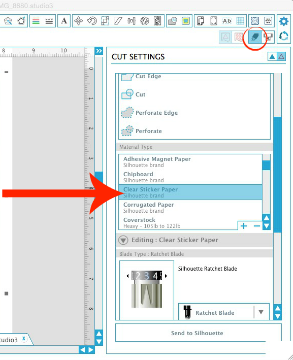
Silhouette settings 10mil laminate. I got it to cut 5mil 125microns. I looked at settings and couldn t work out how to get it in the software to go higher. When placing your laminated page on your mat be sure to line up the actual printed page to the guidelines on the mat. Send the design to your silhouette.
The laminate was cut 12 x 12 to fit my cutting mat. I love using coverstock for paper crafts that need more structure to them like these diy paper lanterns decor. I do have a deep cut blade but haven t used it for fear of breaking it. We start with 10 mil.
Go to cut settings and select your cut settings by finding the closest material for your lamination and tweaking it to the best settings load the pixscan mat in to your silhouette portrait cameo and check the blade depth. Has anyone had success with 10mil 250 micron laminate. I started with the 3 mil laminating sheets they also come in 5 mil. I am laminating using 3 mil clear glossy gbc laminate.
Using laminate sheets. Duck brand peel stick clear laminate. I cannot even get coverstock to feed into my printer because it has. Instead i used 3mil laminating pouches which still provided the durability that i needed.
I used the clear sticker material cut setting with only one pass no double cut which was perfect for my 3mm laminating pouches. Silhouette does not list laminate as a materials choice so i had to play around with the settings. Cameo or portrait or curio with my laminator i would need need to cut or print and cut the design first laminate and then cut again. Well i am just wondering before i purchase it if anyone knows whether or not laminating your printed picture before putting it in the machine will mess with the optics.
Only used it because it was salvaged from printing company i found a pretty cluster of leaves pattern from the silhouette store and after taking measurements of my mannequin. I see that the silhouette portrait has the print and cut feature using optics to read the registration marks. For the 3 mil size set your cricut to cut cardstock. Once the cut lines are in place load the pixscan mat into your silhouette just like any other mat and send to the silhouette.
Finally it was time to cut. Cutting laminated shapes and print and cuts with silhouette plus perfect cut settings monday february 22 2016. For the 5 mil you ll want to set the dial to custom and choose posterboard from the menu. Because coverstock is so thick it can be difficult to print on it.
If you have a laminator just load an empty laminate pocket into your machine and let it do its thing. Coverstock coverstock is a heavy cardstock typically 100 120lb in weight.

Laminating Machine Blusmart Thermal Laminator 2 Roller System 3 Mil To 5 Mil Laminating Pouches Document Photo Laminators Laminated Machine Childrens Artwork
Laminated Labels With Your Silhouette Unoriginal Mom

Minc It Monday I Create A Foiled Lightbox Insert Light Box Minc Foil Heidi Swapp Lightbox

Easyidea Ml450t Id Card Laminator 4 5 Teslin Pouch Laminating Machine By Easyidea Arcadiaid Com 58 99 The Easyideatm Laminators Employees Card Card Pouch

Swingline Gbc Laminating Sheets Thermal Laminating Pouches Badge Id Card Size 10 Mil Heatsea In 2020 Card Sizes Thermal Cards
Silhouette Cutting And Foiling Thermal Lamination 8 Steps With Pictures Instructables

Erin Condren Life Planner Happy Planner Sizes Recollections Planner Cover Set Slay Llam Recollections Planner Erin Condren Life Planner Happy Planner Cover

Double Posts Automatic Oca Vacuum Laminator Machine With Clean Room For Lcd Refurbishing With Images Clean Room Refurbishing

Childs Pretend Play Restaurant Menu Set Etsy In 2020 Play Menu Menu Restaurant Pretend Play

Disney Mine Finding Nemo Luggage Tag Laminated By Howddode Disney Luggage Disney Luggage Tags Luggage Tags Diy

Qty 500 10 Mil File Card Laminating Pouches 3 1 2 X 5 1 2 Hot Laminator Sleeves For More Information Visit Image Link Laminators Craft Supplies 4x6 Photo

Old English Lettering Alphabet Stencils 3 Inch 10 Mil Mediumduty You Can Find Out More Details At T English Calligraphy Lettering Alphabet Lettering Fonts

Create Your Own Durable Planner Cover With A 10 Mil Laminate Of Course You Can Design Your Own Cover Or You Can Follow This Tutoria Sparkle Crafts Vinyl Crafts Paper Crafts
Diy Reusable Stencil With Cricut Explore Daily Dose Of Diy

How To Make Laminated Bookmarks With Free Printable Bookmarks And Cutting File

Planning For An Active 2017 And Motivateme Monday Recollections Planner Yearly Planner Recollections Creative Year

Comparing Notebook Sizes Citrus Book Bindery Travelers Notebook Traveler Notebook Inserts Diy Travelers Notebook

Difference Between Laminating Sheets Lamination Pouches Laminate Sheets Pouch Laminators
3
Pre Cut Scoop Card Laminate Covers Etsy

25 Luggage Tags Laminating Laminator Pouches W Slot 2 1 2 X 4 1 4 10 Mil Laminating Rolls Sheets Pouches Business Industrial Sidra Hospital

Planer Tracker Holz Stempel Kalender Stempel Mahlzeit Tracker Wochentliche Herausforderung Geld Tracker Leseliste Stempel Fur Bullet Journal In 2020 Calendar Stamps Planner Stamps Wooden Stamps

Cricut Projects Cartridge Word Collage Cricut Shop Cricut Cartridges Word Collage Cricut

Witch Trio Witch Design Halloween Silhouettes Vintage Halloween Cards

Iconfinder Is The Leading Search Engine And Market Place For Vector Icons In Svg Png Csh And Ai Format Flower Stencil Stencil Designs Silhouette Stencil

Compass Rose Vinyl Wall Decal Compass Rose Design Compass Rose Compass

Planner Stencil Bullet Journal Stencil Banners And Flag Stencil Fits A5 Journal Mido Bullet Journal Stencils Bullet Journal Banner Planner Bullet Journal

Obsessed With Scrapbooking Cricut Settings Table Scrapbooking Cricut Cricut Crafts Cricut Tutorials

Pin Di Alagaina Scrap Su Fonts Immagini Citazioni Foto

Erin Condren Petite Planner Folio System Review Erin Condren Filofax Planners Filofax Personal

Custom Automotive Rear View Mirror Hang Tags 50 3 60 To 2 500 0 98 Free Numbering Logo Car Mirror Tags Hang Tags School Id

Pin On Volleyball
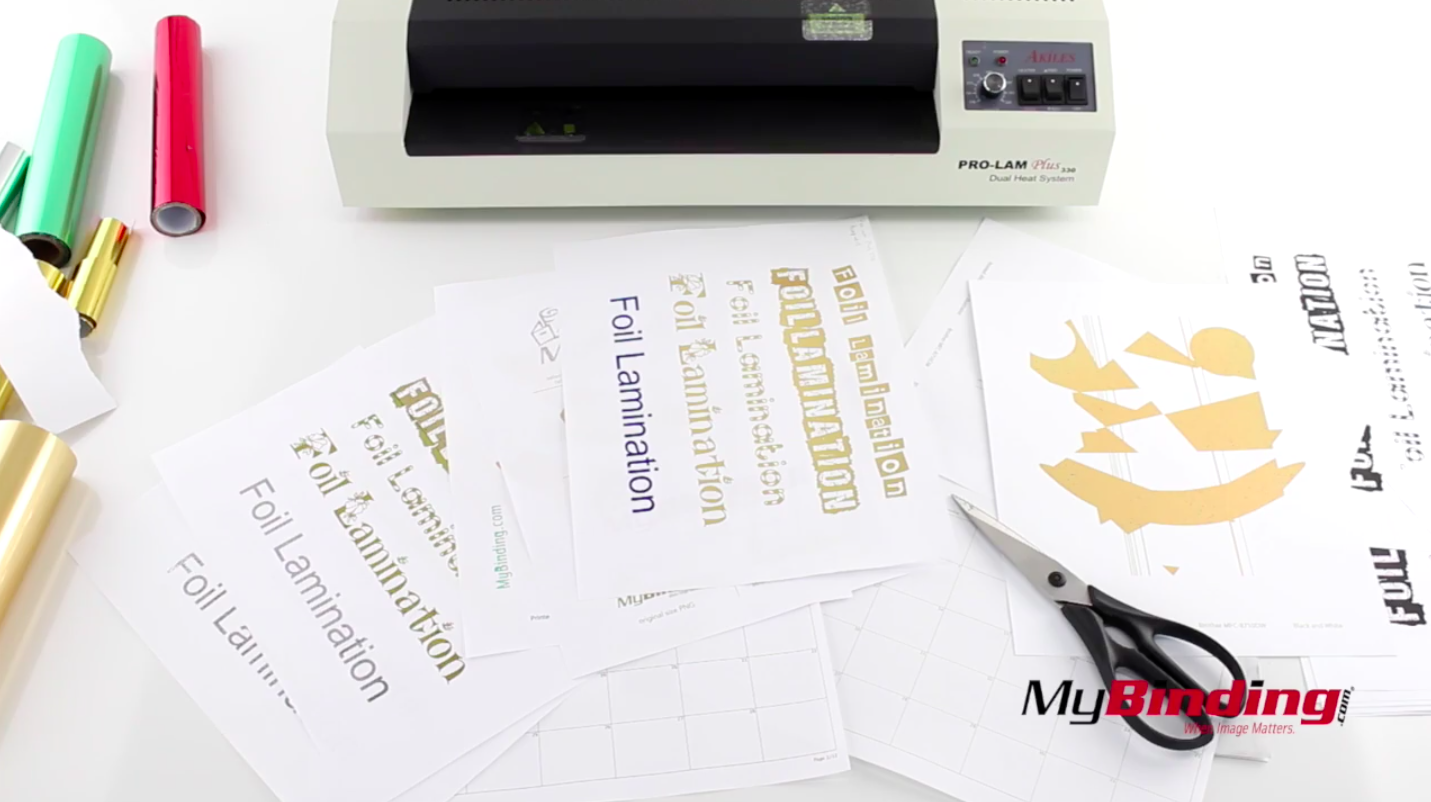
How Do I Laminate Something With Foil

A5 Bullet Journaling Ruler Counts Boxes And Divides Your A5 Etsy In 2020 Bullet Journal Ideas Pages Planner Bullet Journal Bullet Journal Ruler

Corgi Shadow T Shirt Spreadshirt Id 6525421 Corgi Art Dog Silhouette Cat Template

Floral Oriental Black Calligraphy Isolated Seamless Pattern Background Floral Pattern Vector Background Patterns Seamless Background

Japanese Maple Botanical Print By Owen Mortensen At Art Project A Botanical Prints Framed Botanical Prints Botanical Art

Erin Condren Planner Fall Halloween Purple Skeleton Couple Front Back Cover Set Planner Erin Condren Fall Halloween Planner

8x10 White Canvas With Sports Vinyl Saying Great By Getpersonal1 15 00 Sports Vinyl Vinyl Quotes Coach Gifts

Foil Application With A Laminator Will It Work Youtube

Business Industrial Laminating Rolls Sheets Pouches Military Id 10 Mil 100 Pieces Free Shipping Laminating Pouches Thermal Studio In Fine Fr

Beluccia Cursive Fonts Myfonts Calligraphy Fonts

