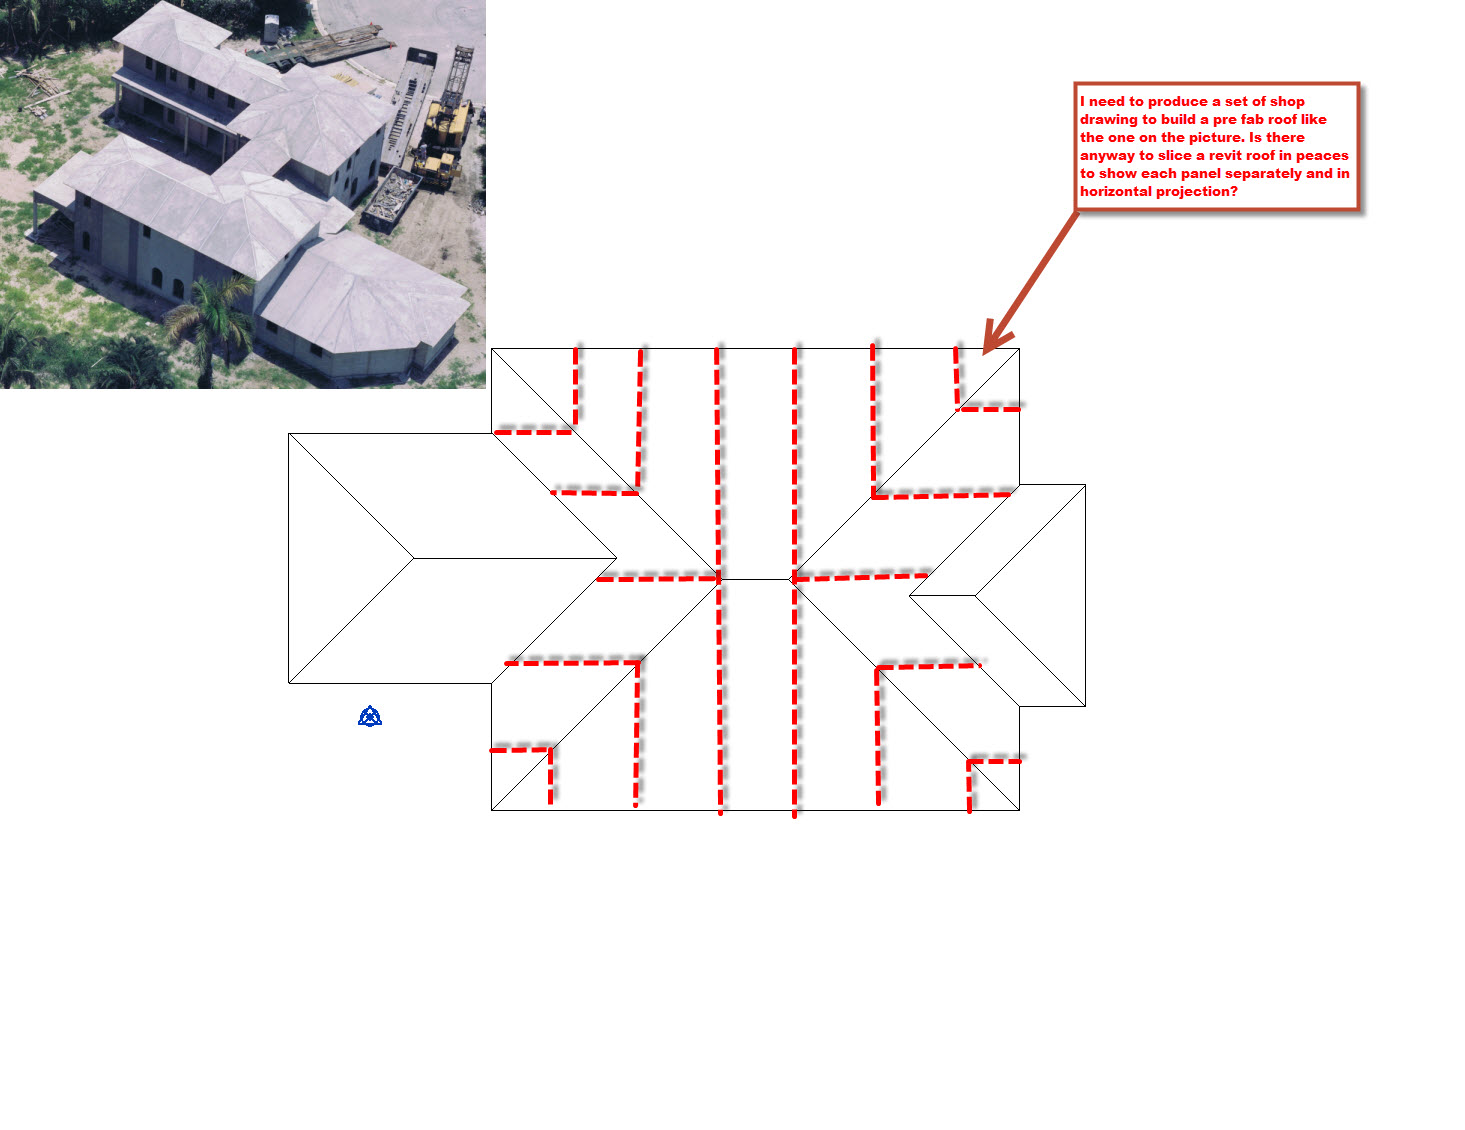
Slice Roof Revit
Split A Roof Or Structural Floor Revit Products 2018 Autodesk Knowledge Network

About Editing Floor And Roof Shape Revit Products 2019 Autodesk Knowledge Network
Solved Roof Spliced In Pieces Autodesk Community Revit Products

Cut Profile Youtube

Revit 07 13 Add Split Line Youtube

How Do I Get A 90 Degree Roof Edge On A Shed Roof Autodesk Community Revit Products
After that you can click finish to execute the cut.
Slice roof revit. This should keep you existing roof in tact and show a cut in the new construction phase. Select a vertex edge face or point anywhere on the structural floor to start the split line. If anyone is still looking for a solution you can make a roof cut into an existing roof using component model in place. Start points and endpoints can be added anywhere on the face of.
Create a sloped roof in revit step 1 draw your roof step 2 define the slope. Load the family into the project and place it. Revit roof slope can seem complicated at first glance but by learning a few critical features you can create any roof shape you desire. Determine the length of the void ideally in 3d view at wireframe mode extend this in order to intersect the roof surface that will be cut use the cut geometry command and select first the roof than the void.
Watch the status bar to be sure that you are highlighting the main roof. Click by face or vertical. In the family category and parameters dialog select cut with voids when loaded and click ok. Click modify tab geometry panel cut drop down cut geometry.
Highlight the main roof on the building model and click to select it. Select the floor to modify. Place the cursor in the drawing area. Whether you want a double gable roof with 6 pyramid shaped dormers or a simple gambrel roof the basics remain the same.
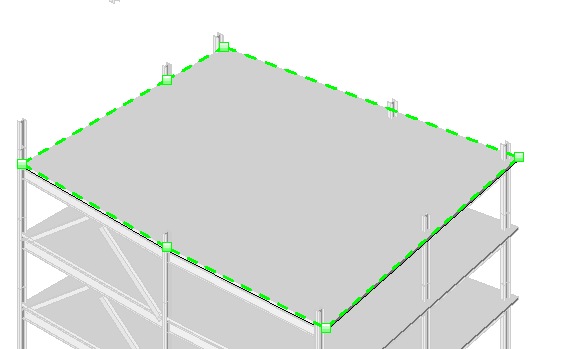
Open the revit family with unattached voids and click create tab properties panel family category and parameters. See hd version of video tutorial here. You can use the add split line tool to add linear edges and to split the existing face of a roof or structural floor into smaller sub regions. Hope this is of assistance.
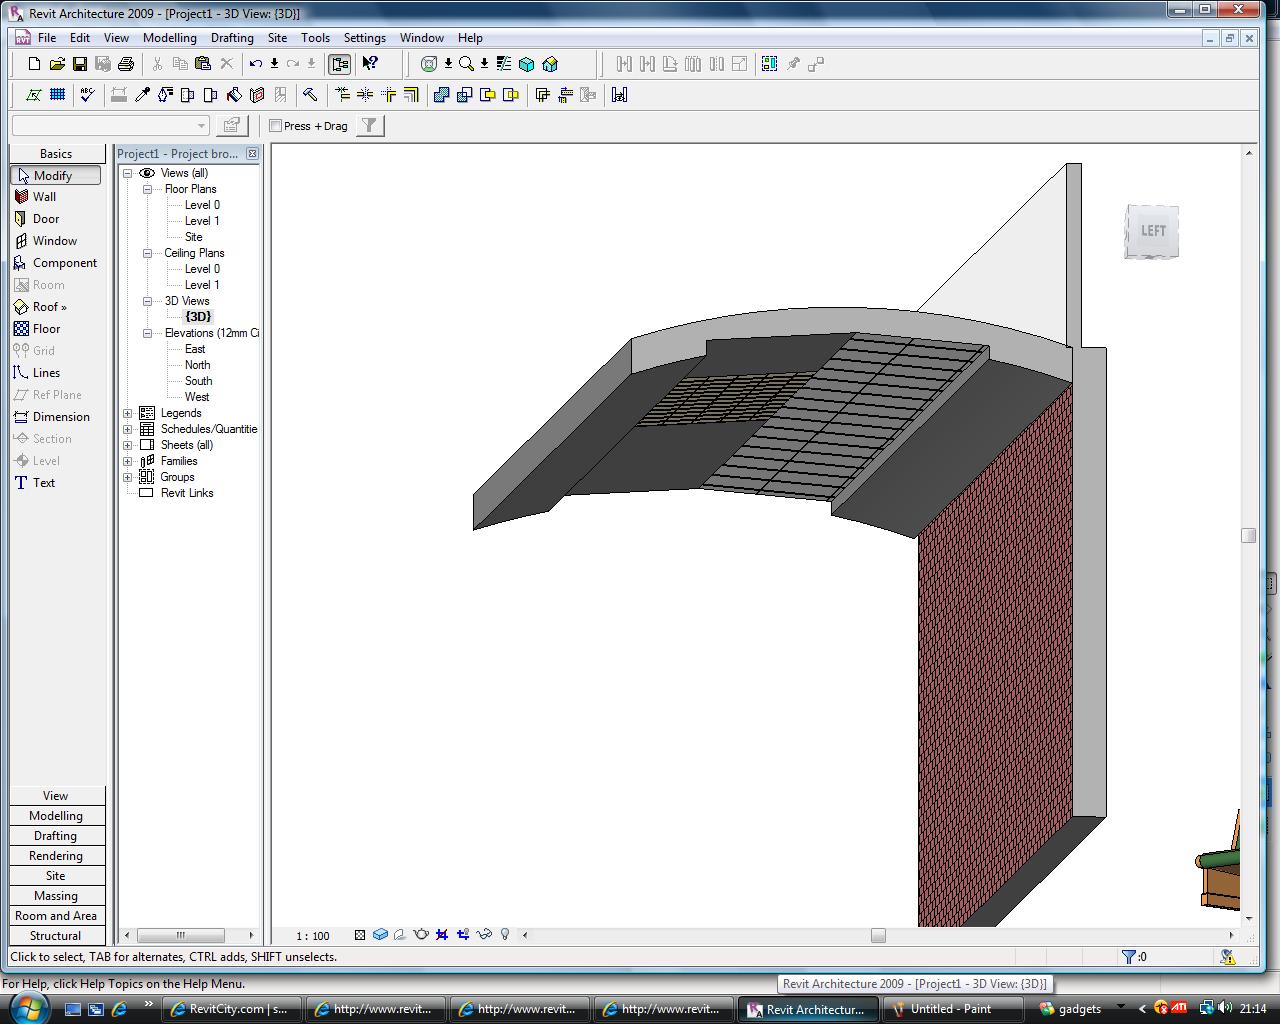
The pick roof wall edges tool is active so that you can pick the boundaries that compose the dormer opening. Use one of the opening tools to cut a vertical or perpendicular opening in a roof floor or ceiling for example to accommodate a chimney. Valid boundaries are highlighted.

9 Tips To Understand Revit Roofs Revit Pure
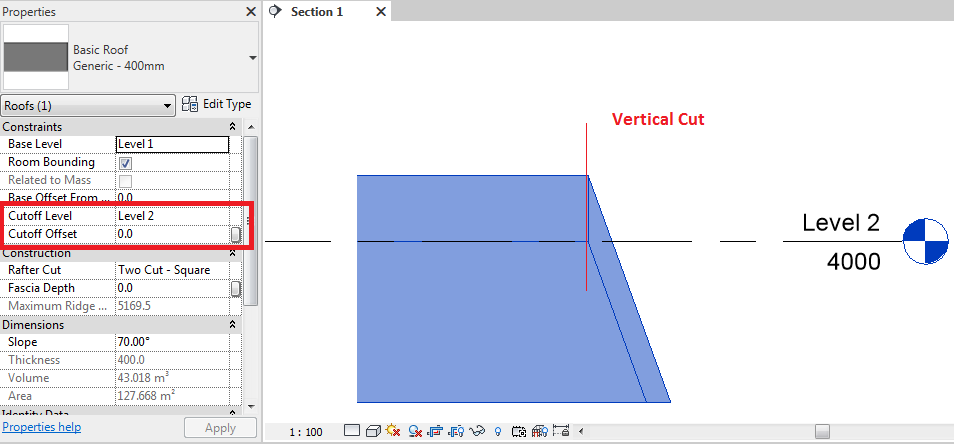
Cutoff Level Roof Behavior In Revit Revit Products 2018 Autodesk Knowledge Network
How To Cut A Hole To A Roof Revit Lt 2018 Autodesk Knowledge Network
21 Revit Keyboard Shortcuts Every Architect Should Know Architecture Design

Revit Splitface And Paint Command A How To Guide Youtube
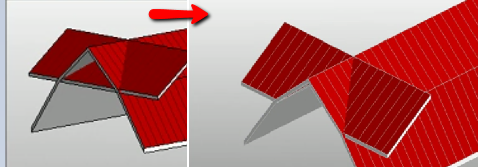
Revitcity Com Joining Roofs

How To Create A Thatch Roof In Revit Micrographics Thatched Roof Thatch Roof

Revit Roof Cleaning Up Overlapping Roofs Youtube

How To Join Split Walls In Revit Using Smartwalls Youtube

Autodesk Revit Creating And Dividing Parts Youtube
Split Faces Revit Products 2018 Autodesk Knowledge Network
Revitcity Com Split Face Tool On Curved Extrusion

Repeat And Divide Prt Iii Slats And Continuous Slices Youtube

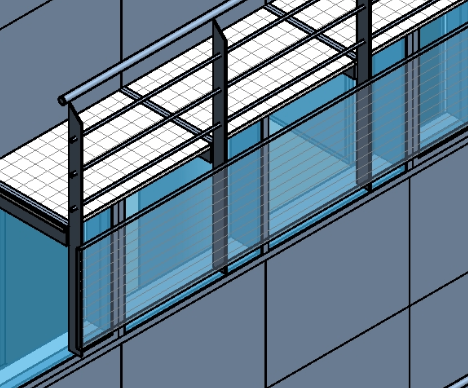
Revit Adding A Curtain Wall On A Floor Or Roof Cadtechseminars Com Youtube

Roof Diseno De Teja Courtain Wall Part 2 Roof Tiles Roofing Roof

26 Using The Shape Editing Tools To Create A Flat Roof Revit Flat Roof Roof Roof Sealant
Show Walls Below Roof Bd Mackey Consulting The Revit Geek Blog
Information About Home Design Revit House Plans
Https Encrypted Tbn0 Gstatic Com Images Q Tbn 3aand9gctcrsiemhqxu7ihynxd5u9pmbjblms Hnrducwiluc Usqp Cau

Revit Single Storey Intermediate 16 Roof Joining Tool Revit Architecture Roof Tools

Revit Cut Geometry Tool Youtube

Revit Slab Cut By Void Family A How To Guide Youtube

Revit Tips Spanish Roof Adaptive Insane Version Revit Tutorial Autocad Revit Roof

How To Do Wall Tiling In Revit Using The Paint Command Wall Tiles Revit Tutorial Wall

How To Split Pipes By Manufacturer S Lengths In Revit Youtube

Autodesk Revit Tutorials 14 Adding A Sloped Floor Autodesk Revit Revit Tutorial Autodesk

Trapezoidal Wall Cladding Wall Cladding Cladding Revit Architecture

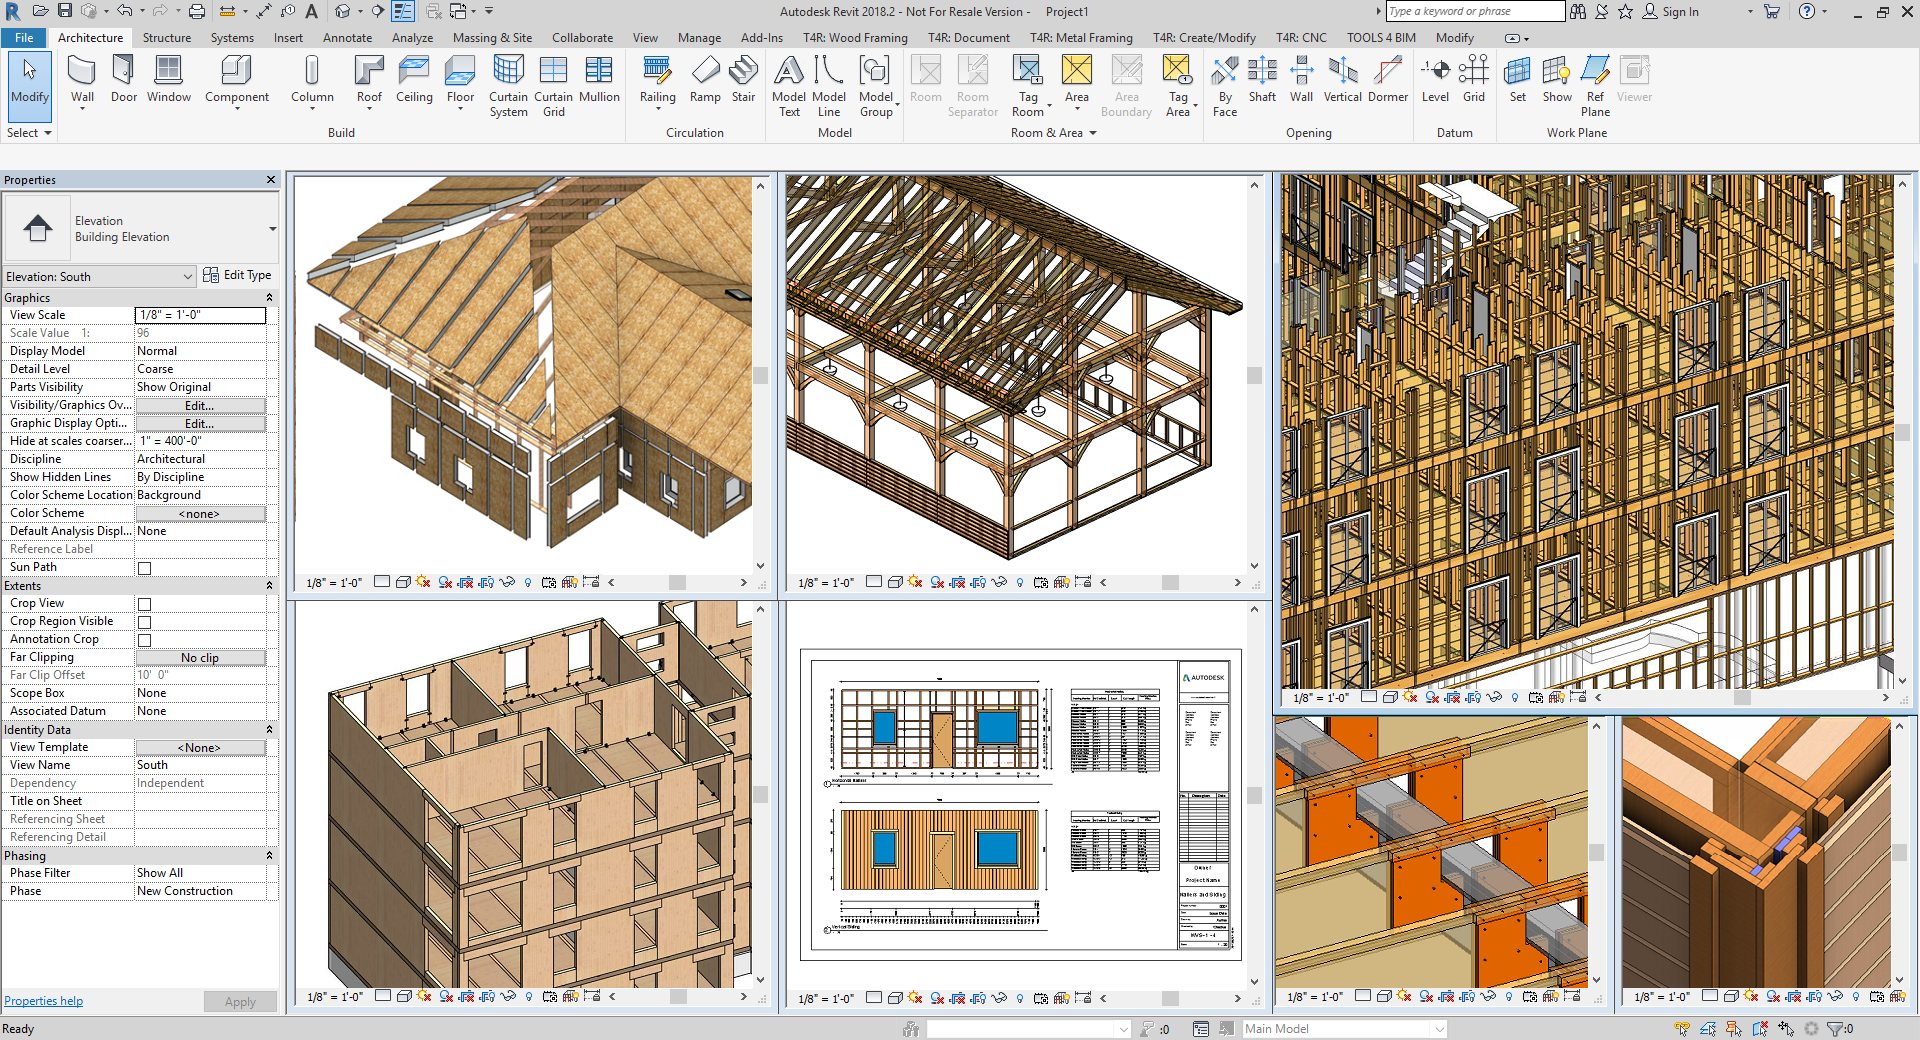
Autodesk Revit Wooden Roof Structure Youtube Roof Structure Timber Roof Roof Architecture

Tutorial Revit Architecture 2013 Splitting A Section Segment Youtube
Dome Roof Using Revit

Revit Tips Tricks Demolish Parts Of Wall Within Phasing White Text On Black Background Youtube
Wood Framing Extension For Revit Lt Version Agacad

Enjoy Revit Dynamo Spanish Roof Tile Generator Roof Tiles Roof Spanish

Trellis Modelling With Glazing Roof Option Trellis Autodesk Revit Autodesk

Slicing An Entire Model In Half Autodesk Community Revit Products
Facades Modelling Operation In Revit Modelical

Revit Tutorials How To Orient To Revit True North Vs Revit Project North Youtube Revit Tutorial Building Information Modeling Autodesk Revit

Webinar 2 Creating Masses In Revit Youtube Archdesignlabs Revit Tutorial Autodesk Revit Mass

Adaptive Component Repeat Revit Parametric 2013 Parametric Design Parametric Architecture Revit Tutorial
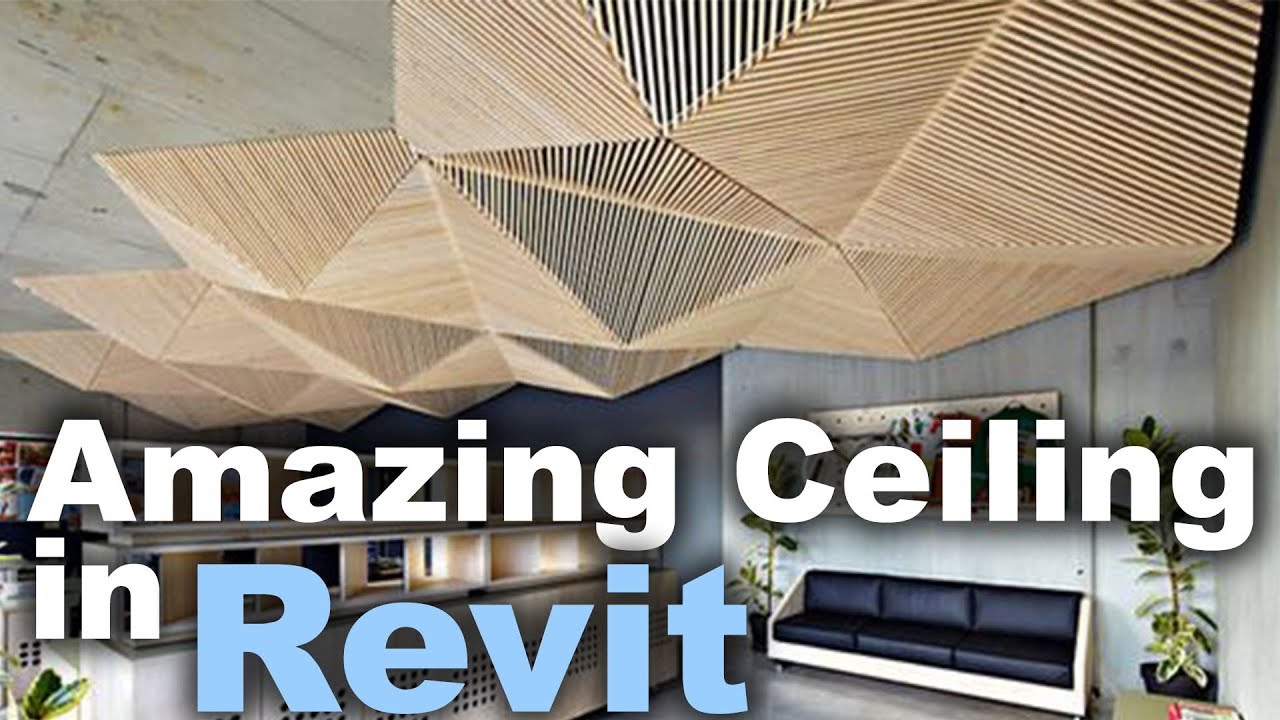
Custom Ceiling In Revit Tutorial Youtube

Creating Revit Presentation Graphics That Pop Building Information Modeling Diagram Architecture Revit Architecture
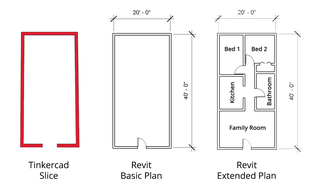
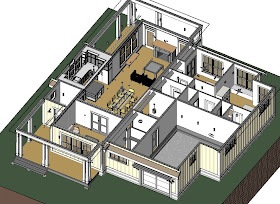
Create A Floor Plan Of Your House 3 Steps Instructables

